Projects
Projects let you organize conversations and files into focused workspaces. Use them to group related threads, attach data sources, and keep your work structured.
Overview
- Workspace Organization: Group related conversations under a single project
- Thread Association: Link threads to projects so they appear together in the sidebar
- Data Sources: Attach files and web content as project knowledge
- Scoped Conversations: Start chats within a project context so new threads are automatically associated
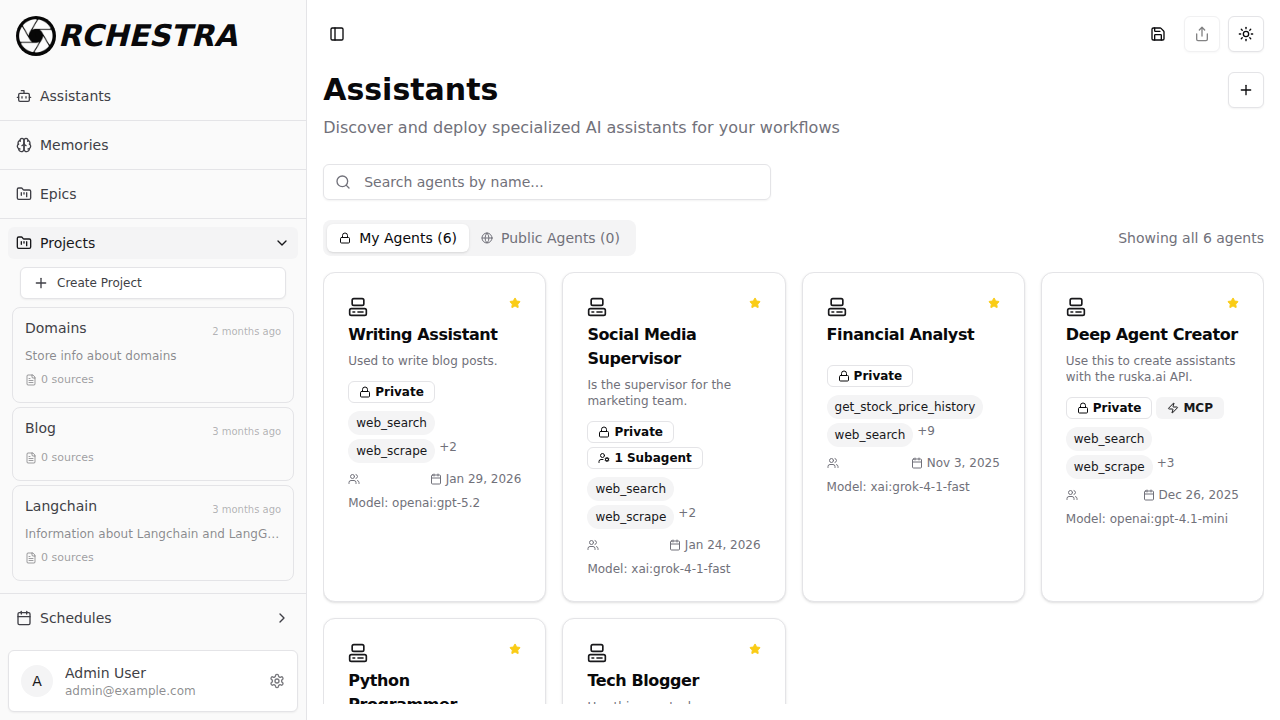
Creating a Project
Via Web Interface
- In the sidebar, find the Projects section
- Click Create Project
- Enter a Name (required) and optional Description
- Click Create
The new project appears in the sidebar under Projects.
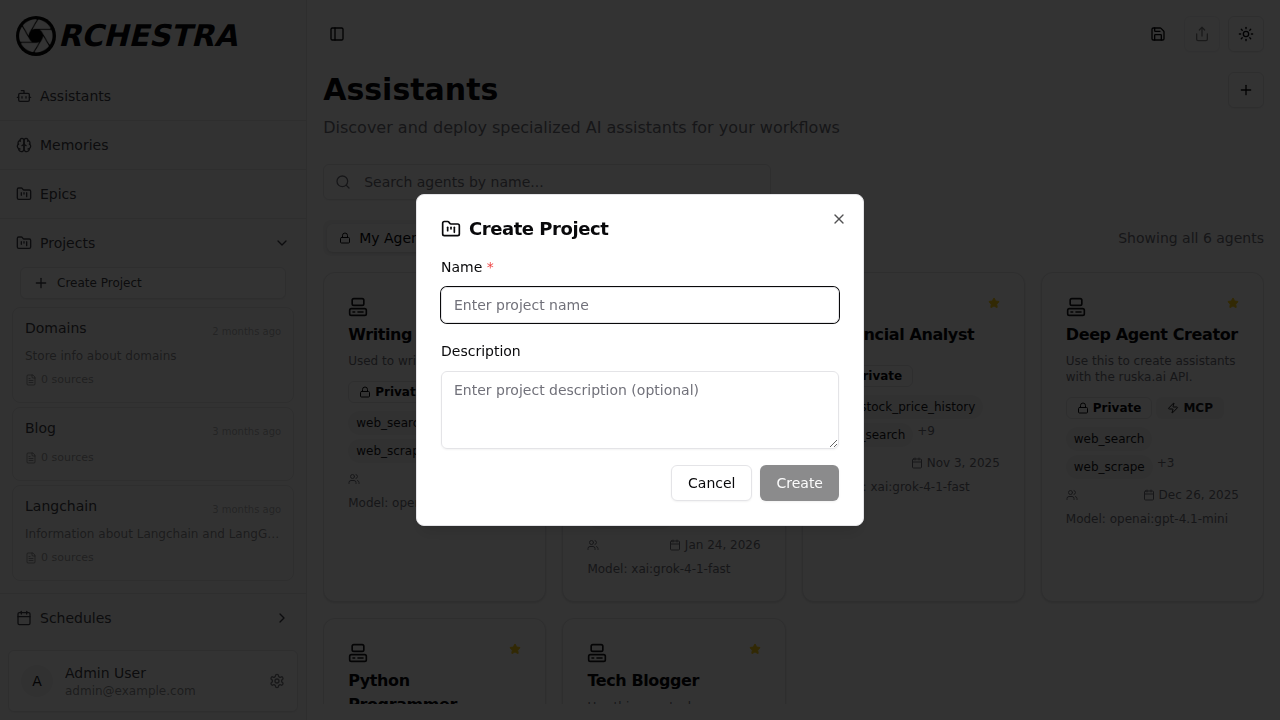
Via API
curl -X 'POST' \
  'https://chat.ruska.ai/api/projects' \
  -H 'Content-Type: application/json' \
  -H 'Authorization: Bearer <token>' \
  -d '{
  "name": "ML Experiments",
  "description": "Machine learning research and experiments"
}'
Response:
{
    "project_id": "project-uuid"
}
Managing Projects
Editing a Project
- Click on a project in the sidebar to open it
- Click the settings icon next to the project name
- Update the name or description
- Click Save
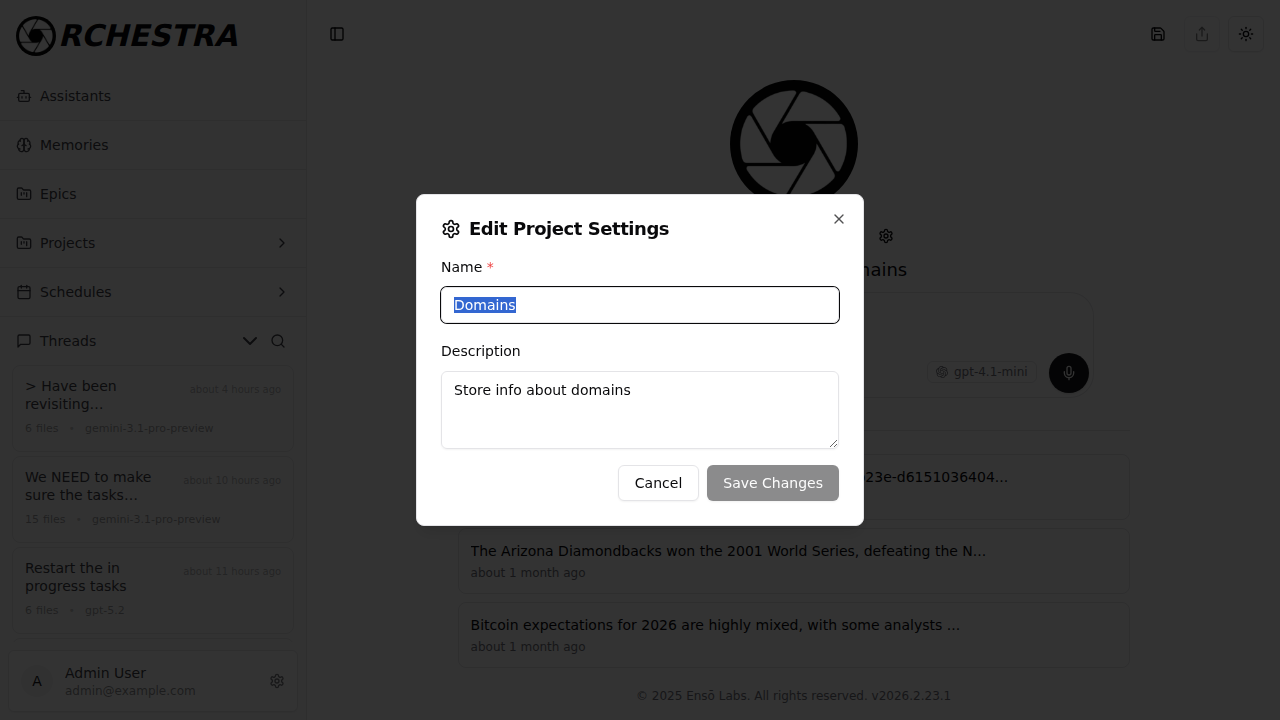
Via API:
curl -X 'PUT' \
  'https://chat.ruska.ai/api/projects/{project_id}' \
  -H 'Content-Type: application/json' \
  -H 'Authorization: Bearer <token>' \
  -d '{
  "name": "Updated Project Name",
  "description": "Updated description"
}'
Deleting a Project
- In the sidebar, hover over the project
- Click the menu and select Delete
Deleting a project also deletes all its associated sources and documents. Threads are not deleted but will be unlinked from the project.
Via API:
curl -X 'DELETE' \
  'https://chat.ruska.ai/api/projects/{project_id}' \
  -H 'Authorization: Bearer <token>'
Listing Projects
curl -X 'POST' \
  'https://chat.ruska.ai/api/projects/search' \
  -H 'Content-Type: application/json' \
  -H 'Authorization: Bearer <token>' \
  -d '{
  "limit": 200,
  "offset": 0
}'
Associating Threads with Projects
You can link existing threads to a project, or create new threads within a project context.
Moving an Existing Thread
- In the sidebar, right-click on a thread
- Select Add to Project or Move to Project
- Choose the target project
- To unlink, select Remove from project
Starting a New Conversation in a Project
- Click on a project in the sidebar to open it
- Start typing in the chat input — new threads are automatically associated with the project
- The project name appears as a badge in the chat input area
The sidebar intelligently groups threads: project-associated threads appear under their respective project, while unlinked threads appear in the general Threads section.
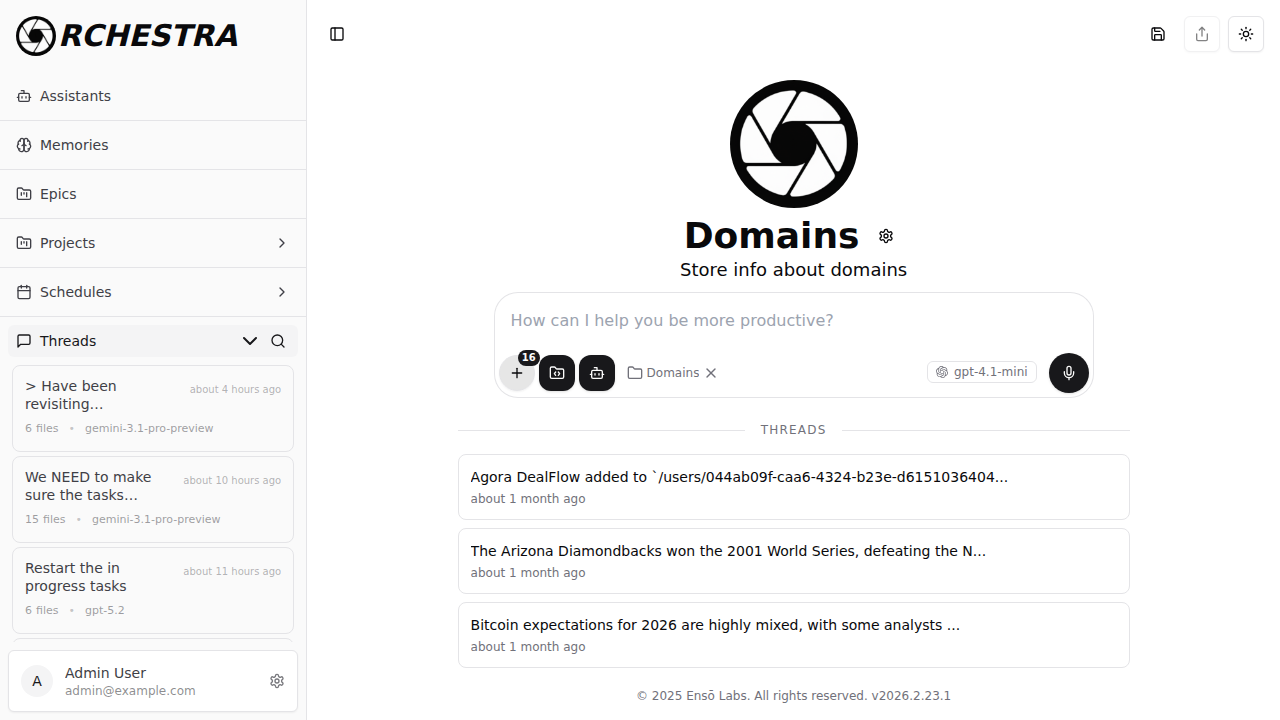
Project-Scoped Conversations
When you open a project and start chatting, the conversation is automatically scoped to that project:
- A project badge with the project name appears in the chat input
- New threads inherit the project association
- You can click the X on the project badge to remove the association
This scoping persists across page reloads, so you can continue working within a project context seamlessly.
Data Sources
Projects can have attached data sources that provide additional context:
Adding Sources
- In the sidebar, hover over a project and click Add Source
- Choose the source type (file upload, web scrape, etc.)
- Provide the content and click Save
Via API:
curl -X 'POST' \
  'https://chat.ruska.ai/api/projects/{project_id}/sources' \
  -H 'Content-Type: application/json' \
  -H 'Authorization: Bearer <token>' \
  -d '[{
    "type": "web_scrape",
    "content": {
      "urls": ["https://example.com/docs"]
    }
  }]'
Removing Sources
curl -X 'DELETE' \
  'https://chat.ruska.ai/api/projects/{project_id}/sources/{source_id}' \
  -H 'Authorization: Bearer <token>'
Related Documentation
- Assistants: Create agents to use within projects
- Threads: Conversation management
- Storage: File and knowledge base management
Next Steps: Create a project and start organizing your conversations!